Tandemtreffen 2026

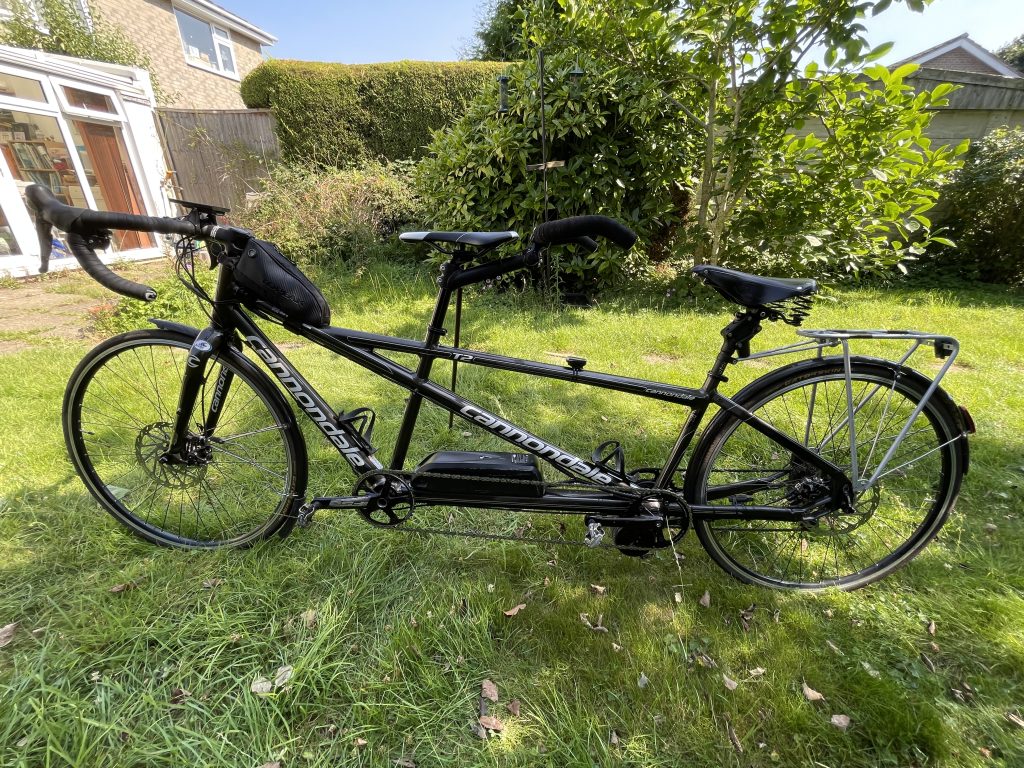
This year we were back in the Black Forest, but a little further south and closer to Switzerland. Too far to cycle in the time we had available to us, so we packed the Pino into the car and headed for Dover.

Our DFDS ferry for Dunkirk was at 10am but rather than risk the M25 and an early start, we stayed overnight in the Dover Marina Hotel, – it’s under new management, has been refurbished and is a little more upmarket since we stayed last time.

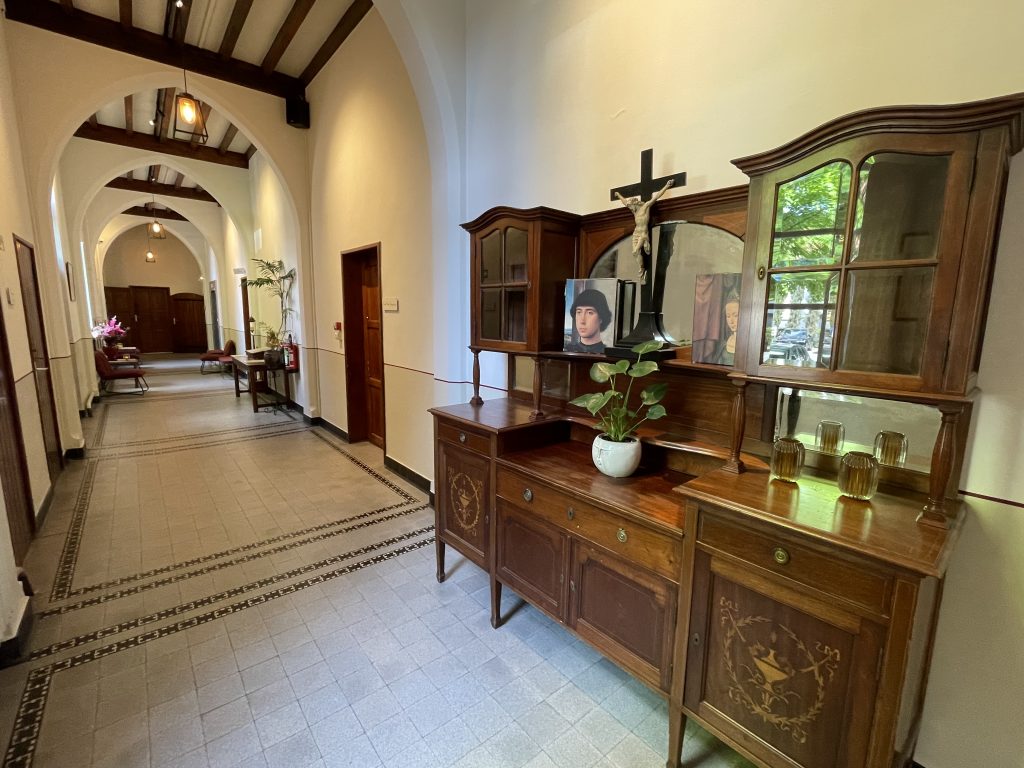
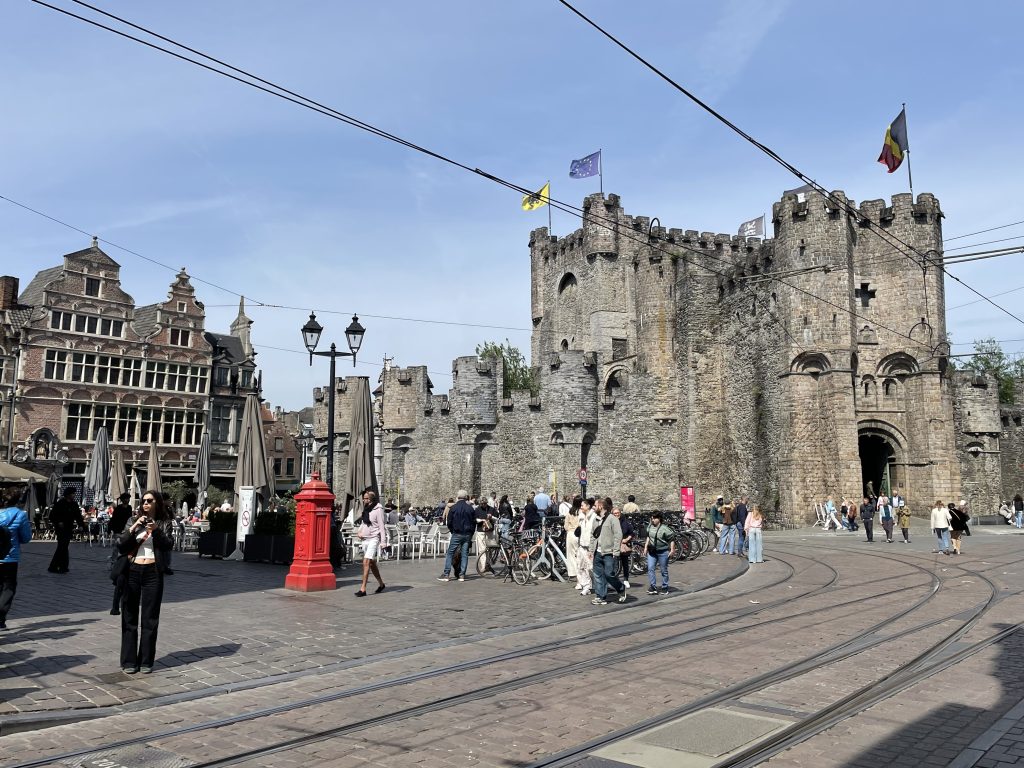
Our first stop on the way to the Black Forest was in Ghent, Belgium, where I had booked a couple of nights in an ex-monastery that is still used for retreats. It made for a nice, quiet atmosphere and was only a short walk into the old part of the town.

Monasterium Poort Ackere, Ghent, Belgium Monasterium Poortackere.

After settling into our room and resting for a while, we walked into the centre for a drink and some food, as there’s no restaurant in the hotel. There are several big churches in the old town and St Michael’s was on our route and open for a short while, so we took a look inside.

St Michael’s, Ghent.

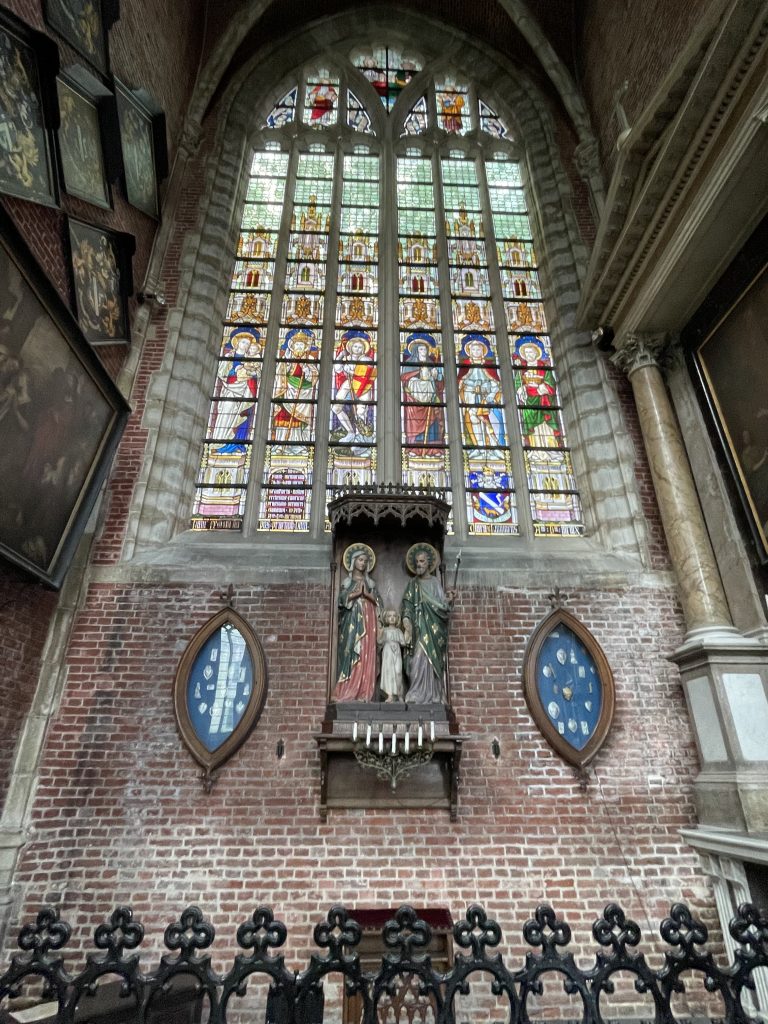
It was close to five pm and so we were soon ushered out to continue our walk.

Leaving St. Michael’s we walked across the bridge.

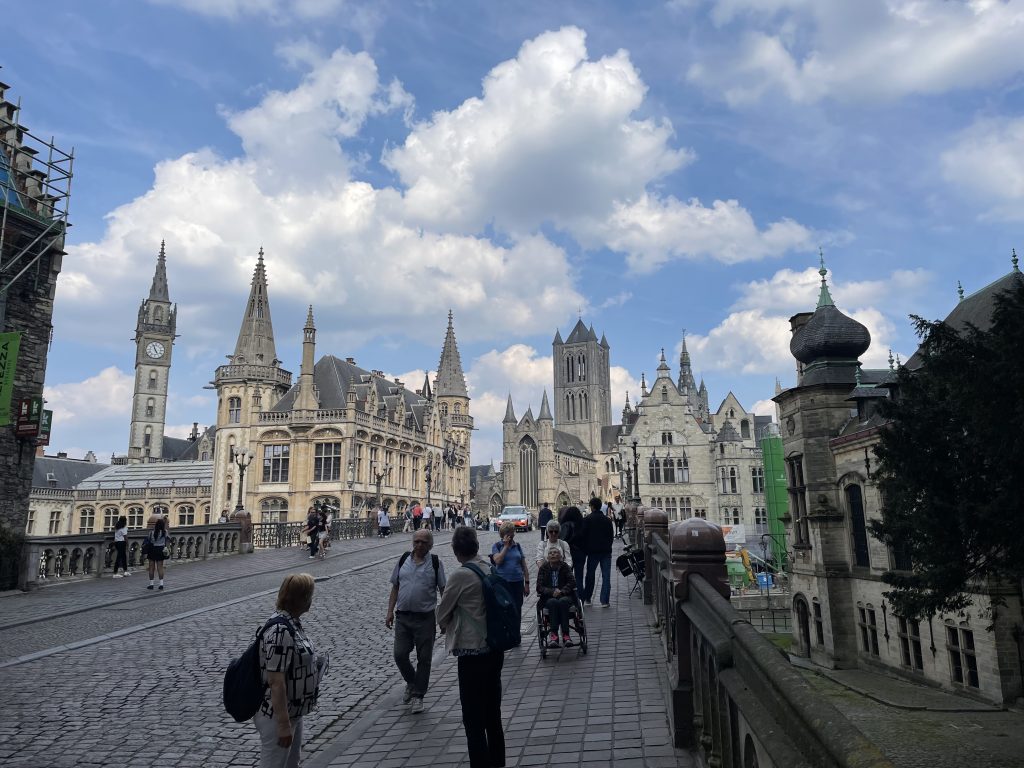
We soon found an empty table outside an Irish pub just over the bridge, where we could sit and enjoy a drink and watch the world go by. Later, we moved inside for some food then resumed our walk alongside the waterway, but only as far as the next bridge, which we crossed and headed back, along the other bank.

The old part of Ghent is very popular with tourists, but you can see why.

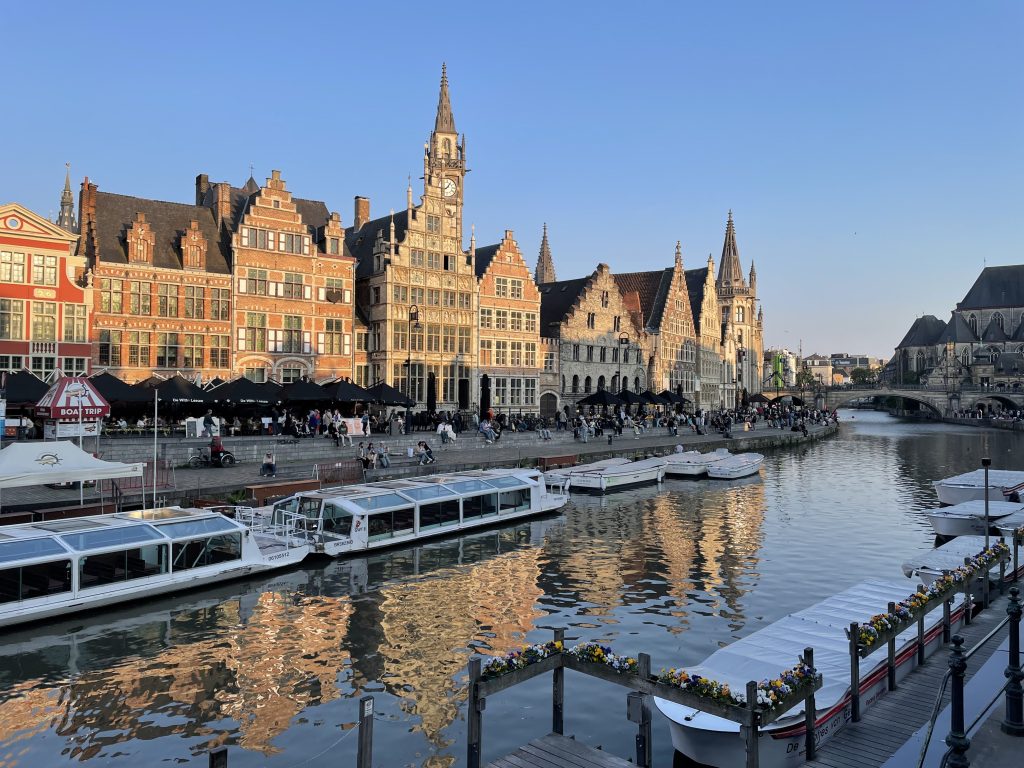
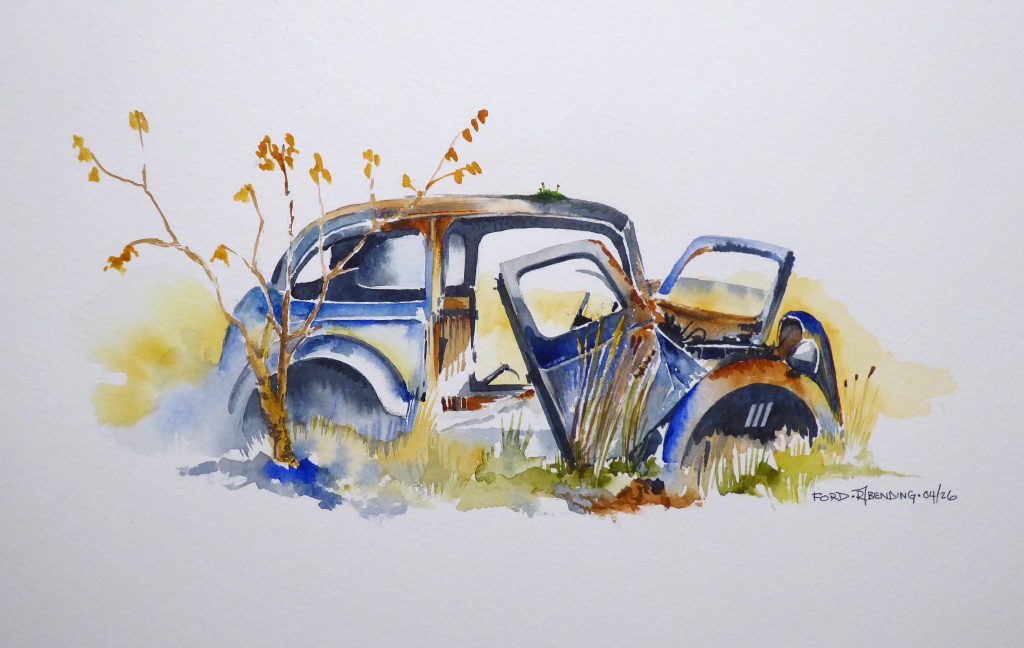
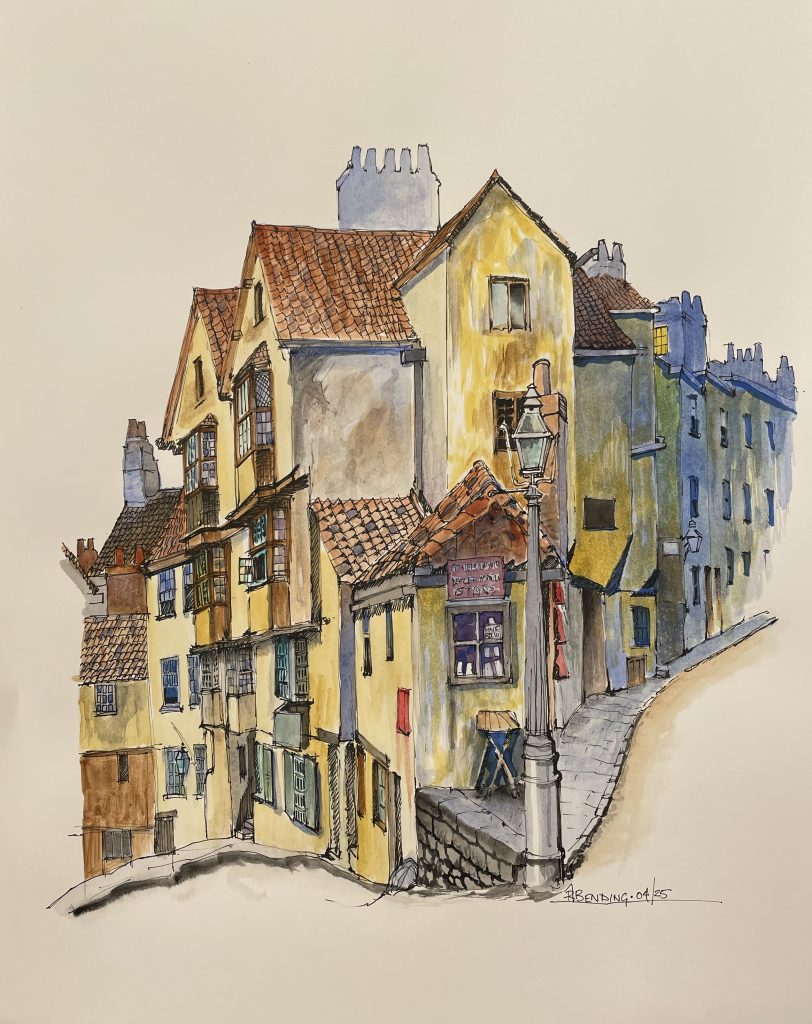
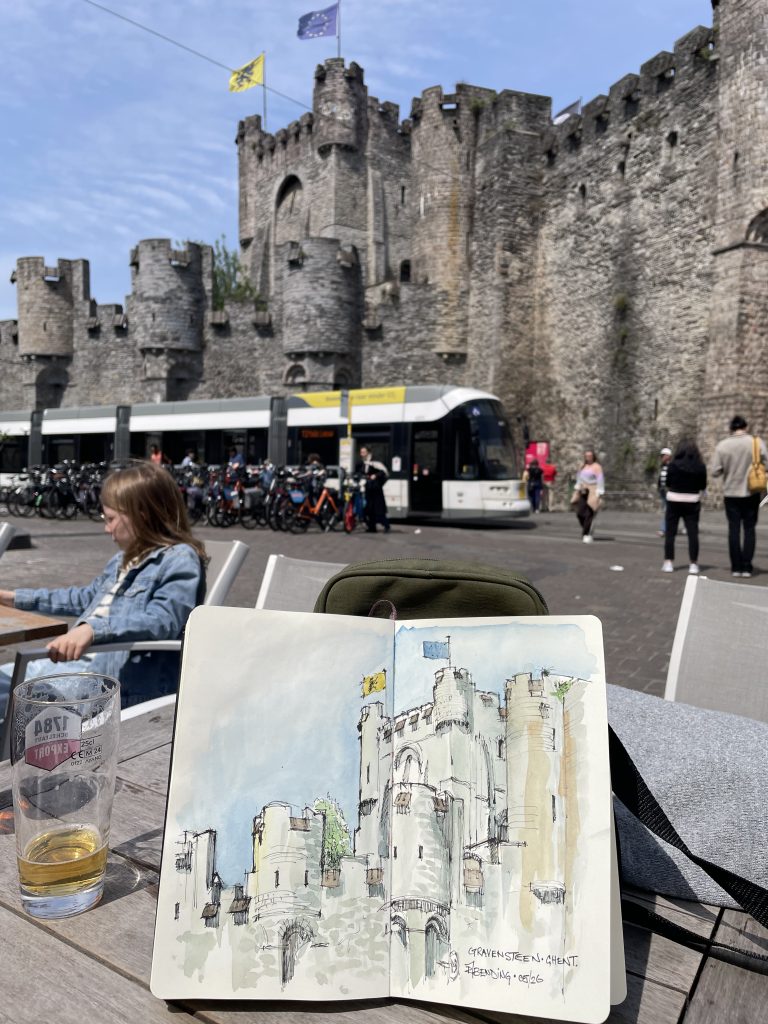
The next day we decided to head back but on the Pino. We found a good spot to sit and sketch the Gravensteen…

The Gravensteen, moated castle dating back to the 10th Century.
My sketch.

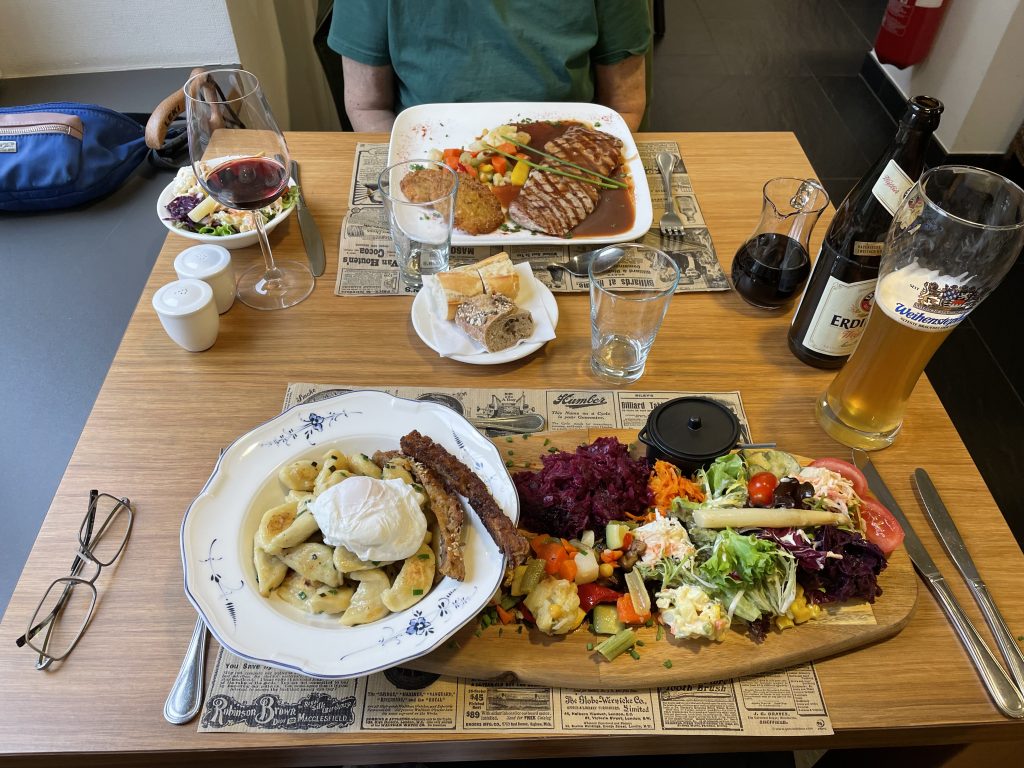
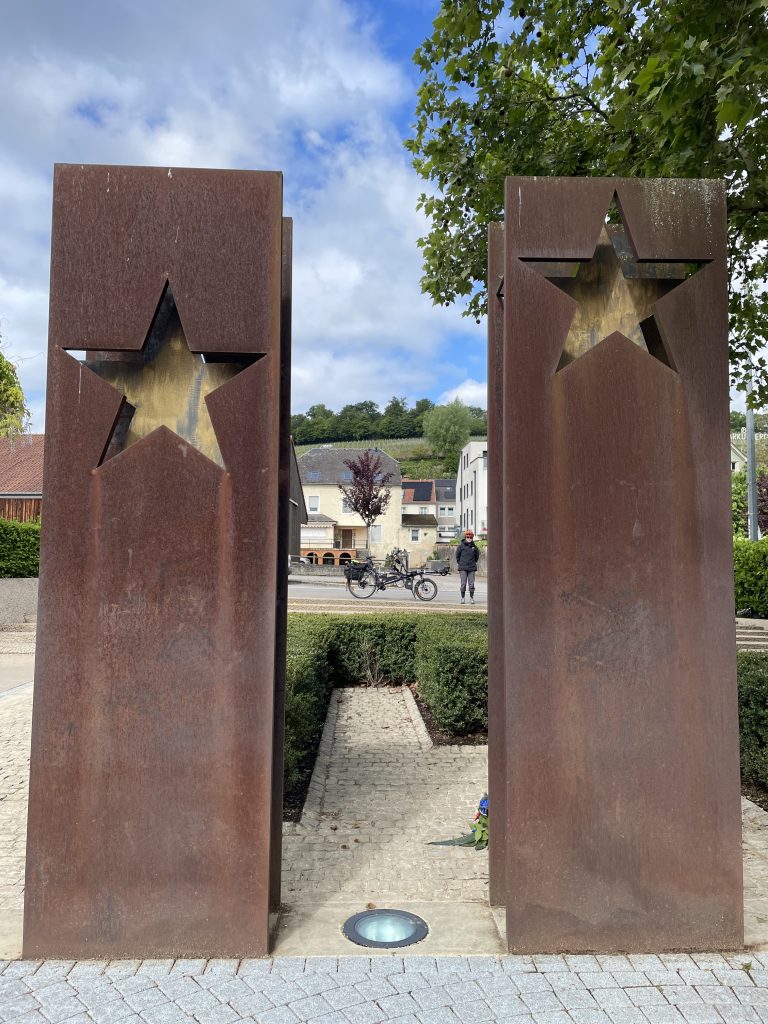
The following day we drove further south, to the area around Schengen, to the small town of Mondorf-les-Baines, and to another ‘cloistered’ hotel. Luckily this one did have a restaurant and I think even Friar Tuck would have been satisfied with the portions!

Mealtime at Hotel Residence Am Klouschter, Mondorf-les-Baines.

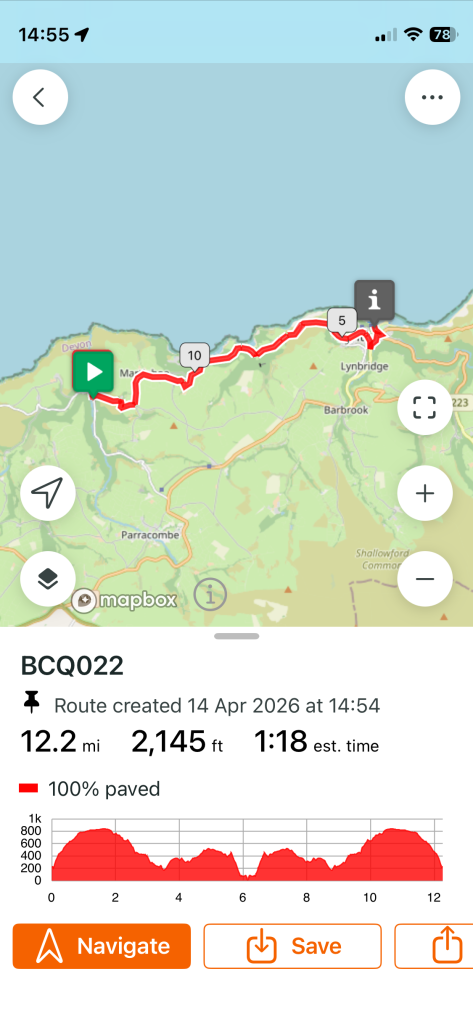
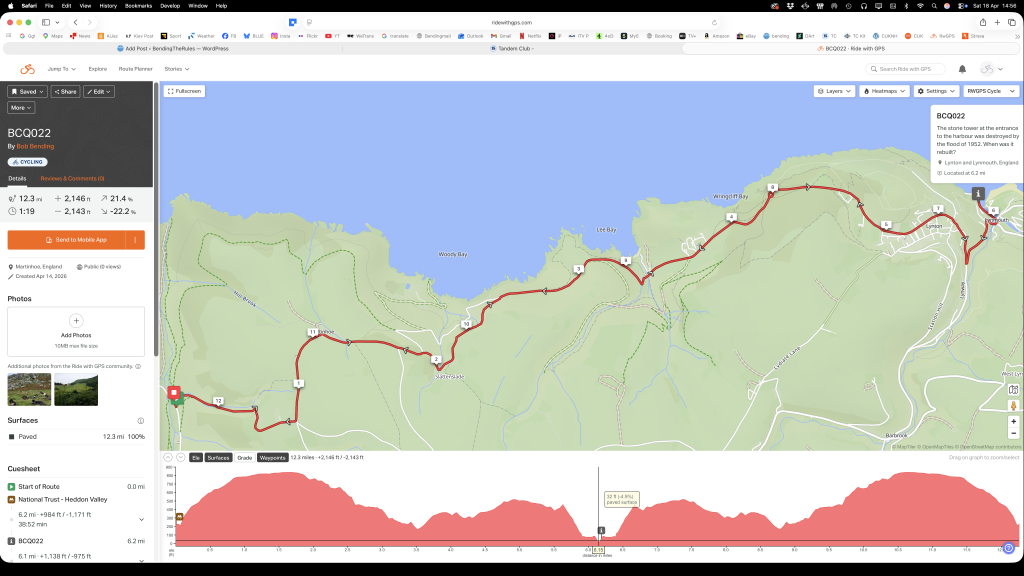
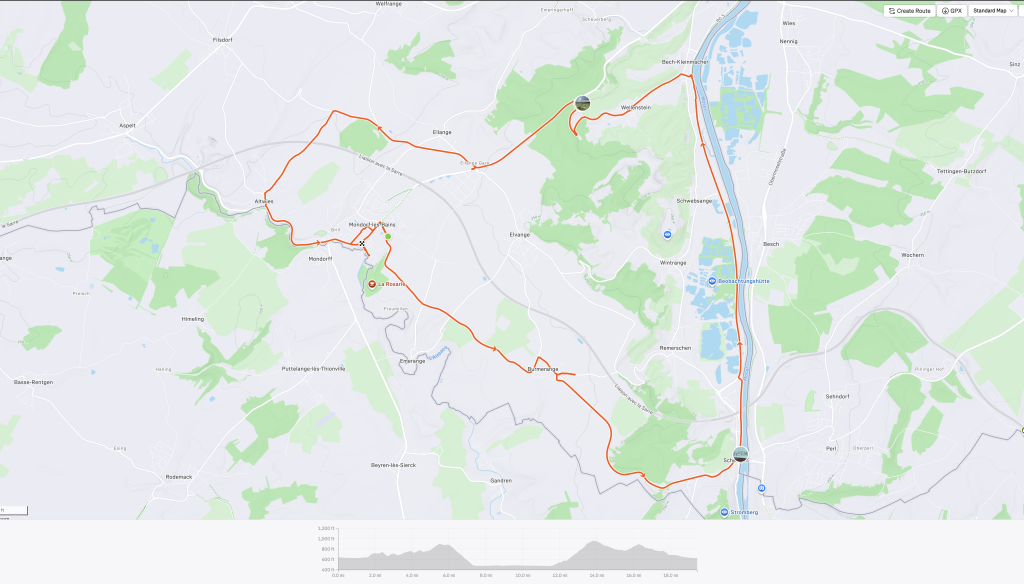
A quick search on the RideWithGPS app on my phone came up with a 16 mile circuit to run beside the Mosel. I adapted the route to make a 20 mile circuit.

Before we set off, we did a quick recce into the town, then cycled South East towards the Mosel, joining it at Schengen. We then ran North before climbing away from the river and back to the town, where we stopped at a bar we had seen on our recce.
The memorial at the riverside spot where the Schengen Agreement opened up European borders for free movement.
At the top of the climb away from the River Mosel, Karon found a swing!
Though the skies threatened and it was cold, it didn’t rain on us.

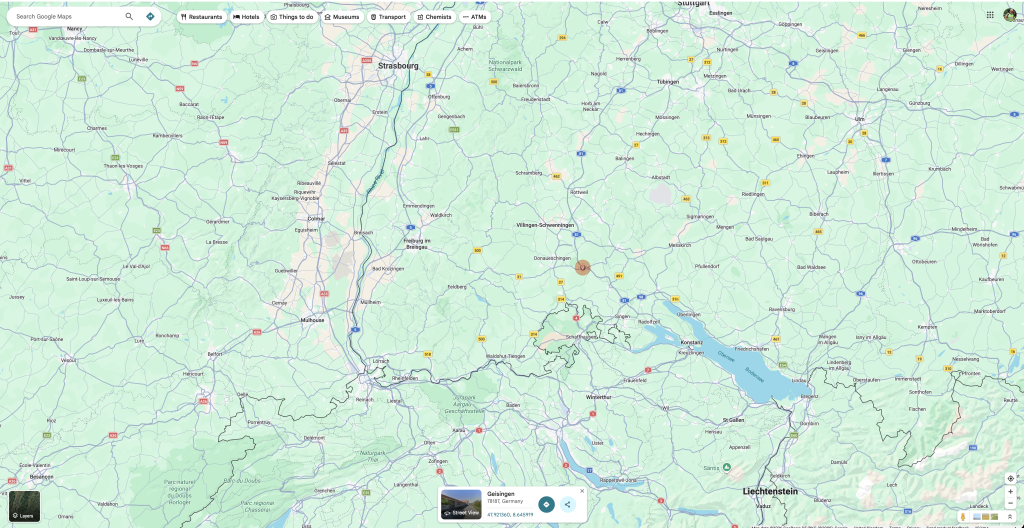
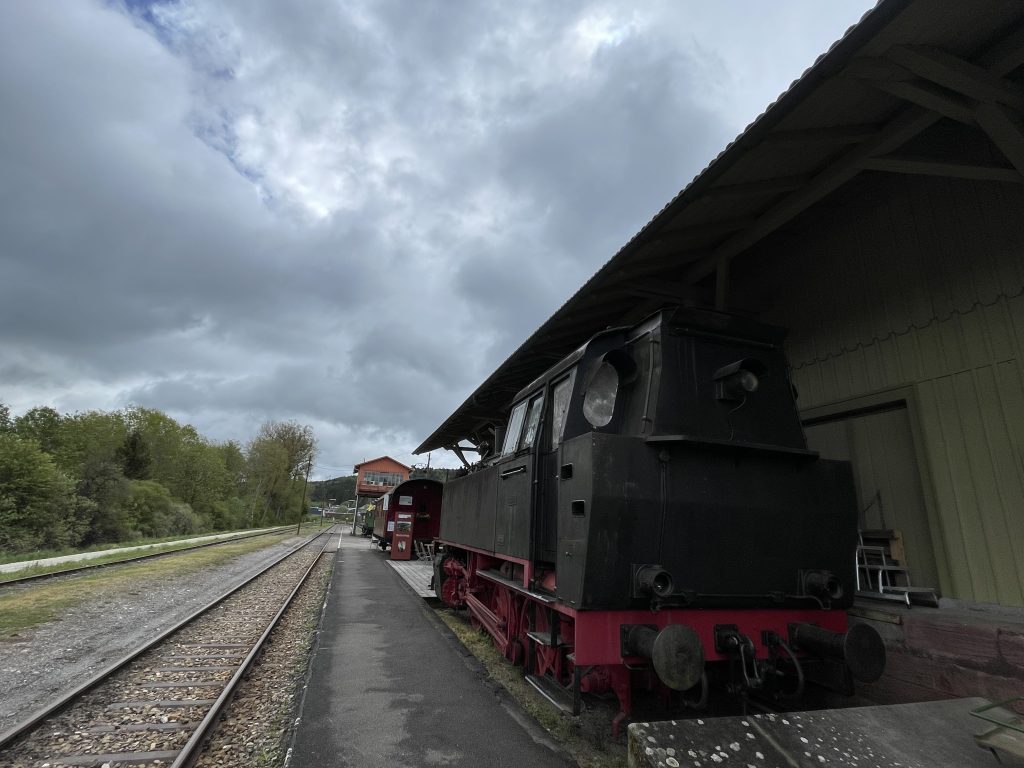
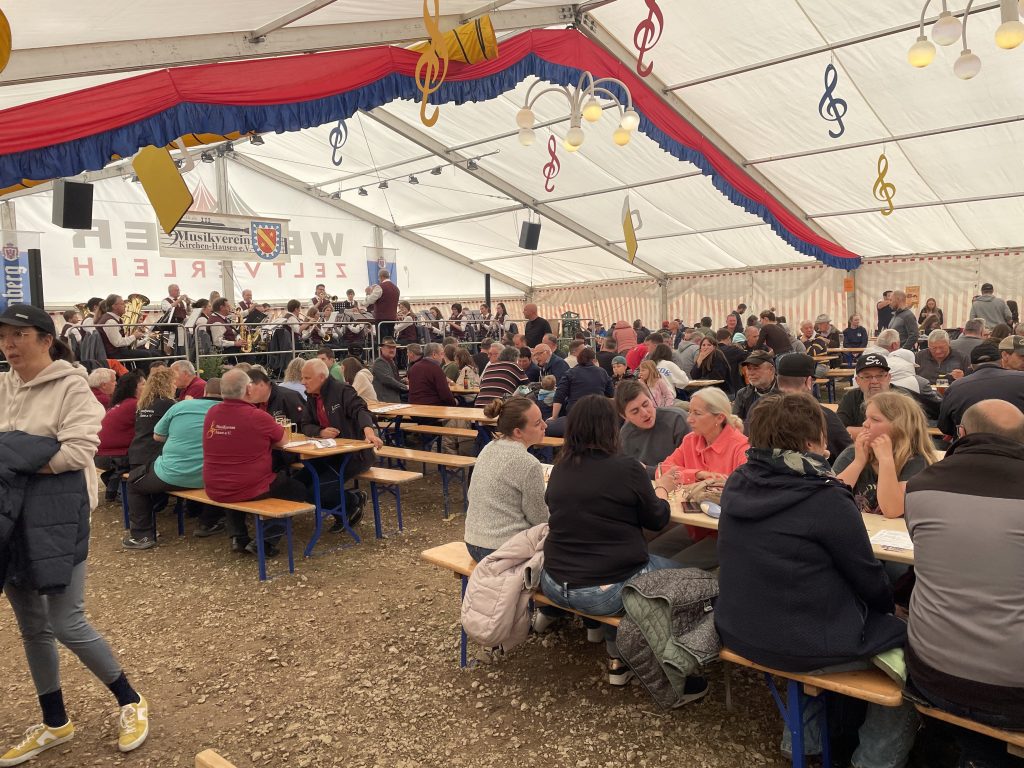
From Mondorf-les-Baines it was about 3.5 hours driving to arrive at the Hotel Sternen in Kirchen Hausen, just outside Geisingen. The Danube ‘flows’ between the two communities. The hotel was split between four buildings and there was an underground garage where we could leave the bikes overnight and charge up batteries. After getting sorted with our gear and the bike, we met up in the bar area for a meet and greet over a complimentary drink. Later we ate together and then Reiner briefed the group on the rides for the following day.

Day 1 – short route. Clockwise from the hotel, mostly following river valleys but with one relatively easy climb.
Our route followed this rail track for a while and we stopped here, at an old station, now museum. Luckily there was a mobile coffee/snack stall – most German coffee isn’t to our taste and here it was pretty dire, but hot and wet!
An unusual piece of engineering on this locomotive. I think it may have been an oil-cooler.
We saw a few groups while out on the ride, but the celebrations for ‘Father’s Day’ didn’t seem as popular in this area, as we had encountered in previous years further north.

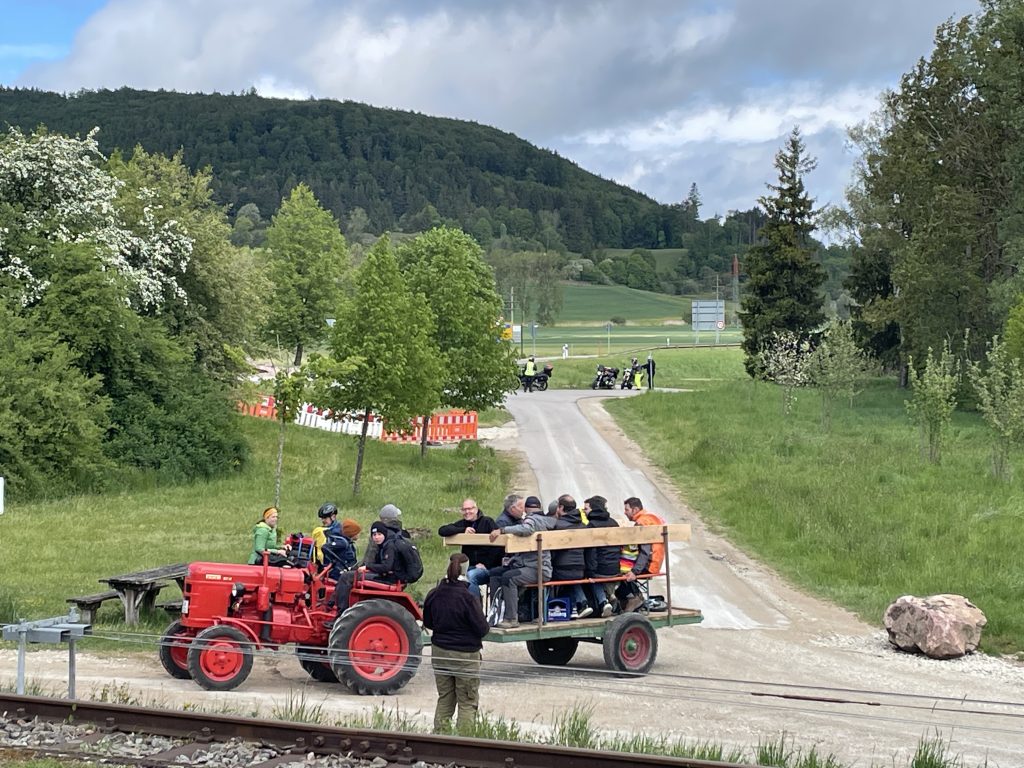
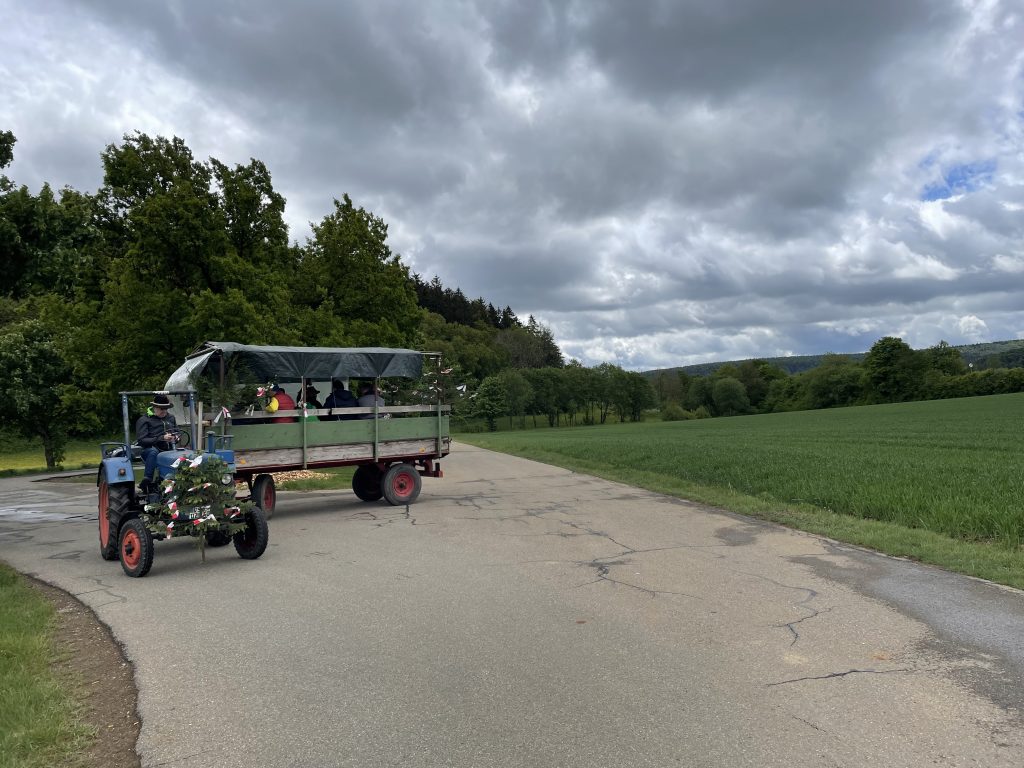
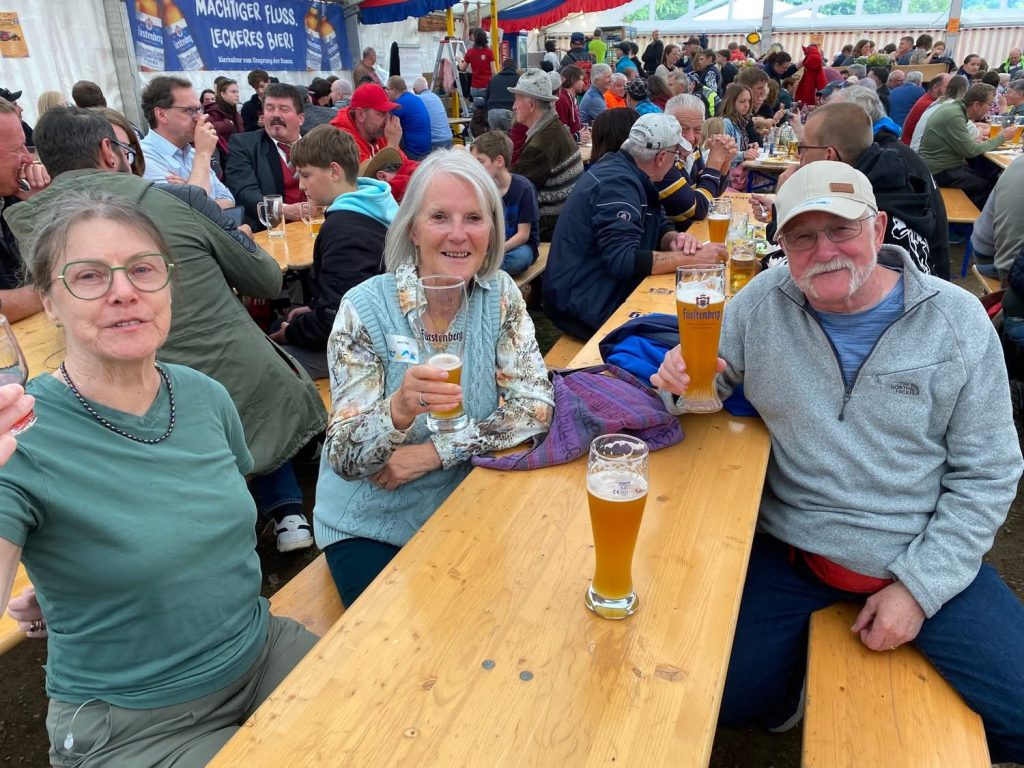
In Germany, Father’s Day (Vatertag) is uniquely celebrated on Ascension Day (Christi Himmelfahrt), which always falls on the Thursday exactly 40 days after Easter Sunday. The day is famous for group outings, where groups of (mostly) men—fathers or not—spend the day outdoors hiking, cycling, or visiting beer gardens. Those on foot often pull along a trailer stacked with beer and often, a music system thumping out a beat.

With the weather threatening downpours and hail, a covered wagon was a wise choice.
We were finished and back at the hotel well before four, when the bar in the hotel opened, so we walked down to the village beer festival, which is where, it seemed, all the villagers were.
Photo by John Taylor. Jane and John were the ones who introduced us to the Tandemtreffen group several years ago.

In the evening, after dinner, one of the tandem teams gave a presentation of their ride around Europe. Lots of words, and lots of photos, it was split over two evenings.

Day 2 took us north west, to the source of two rivers.

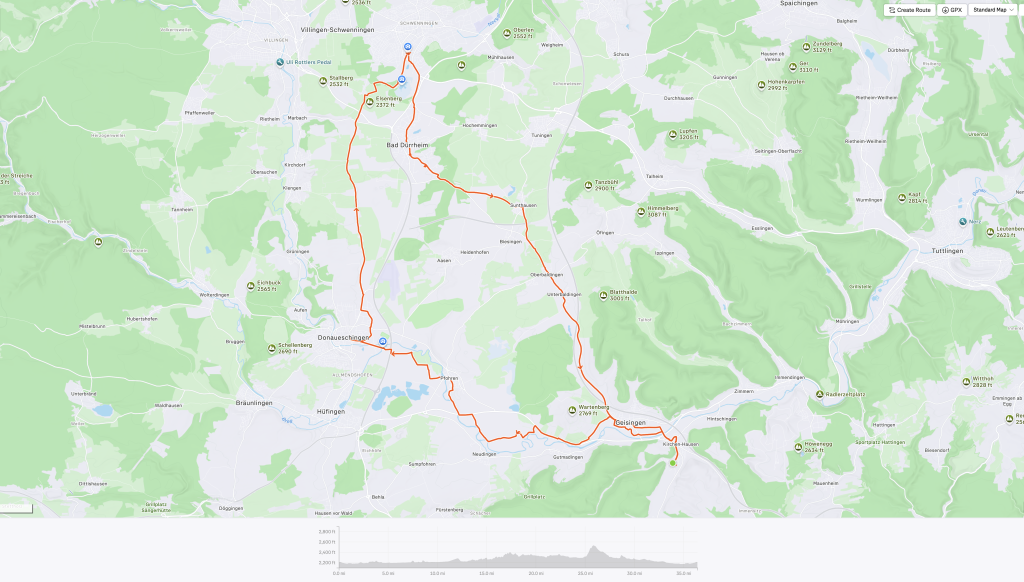
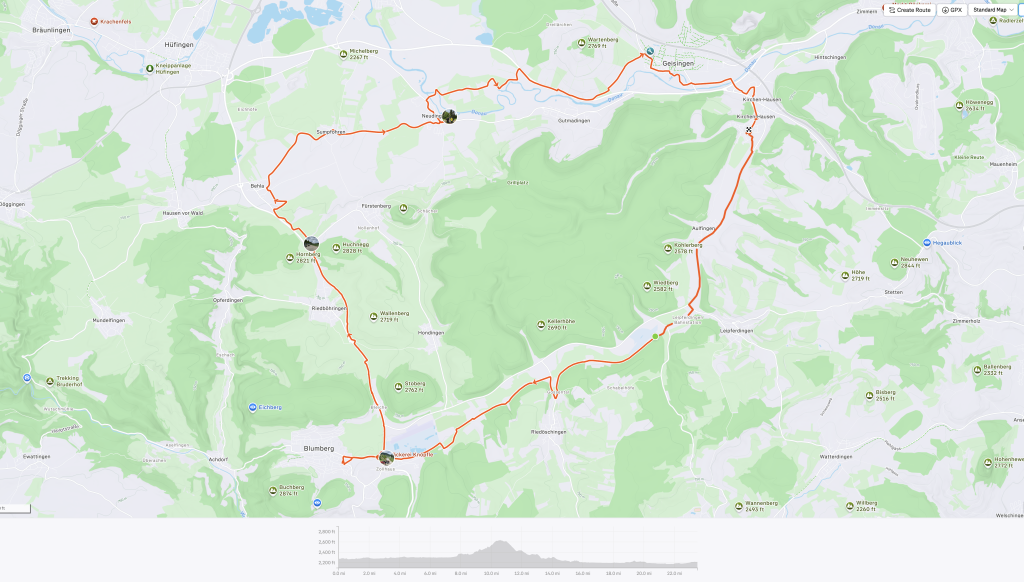
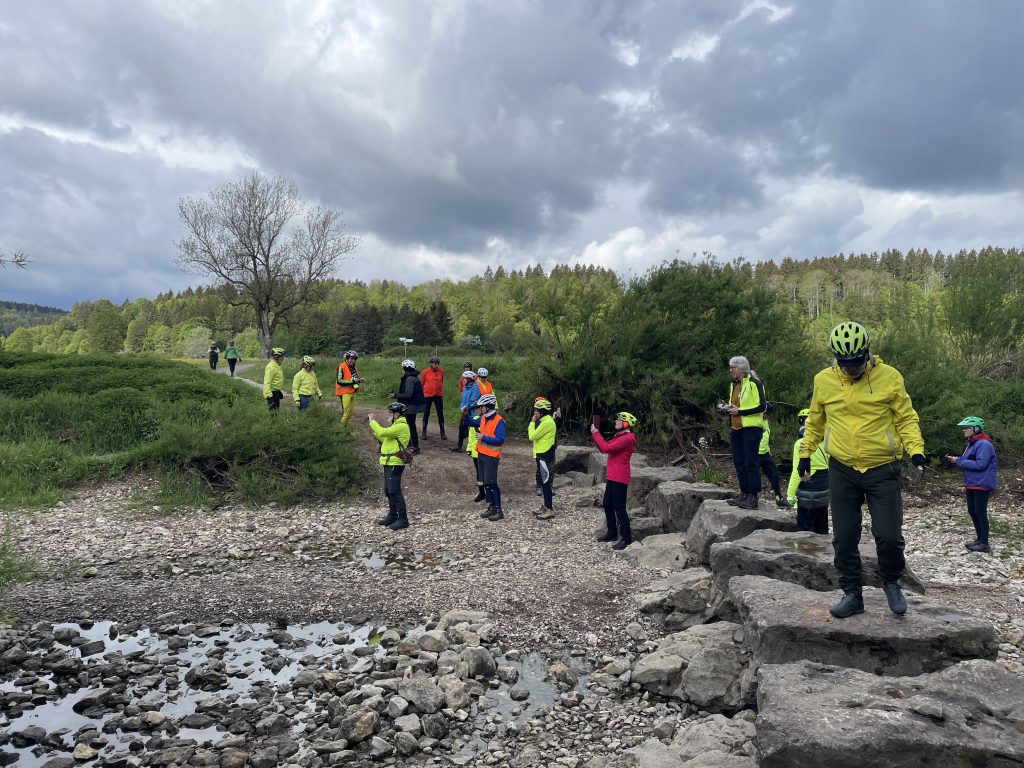
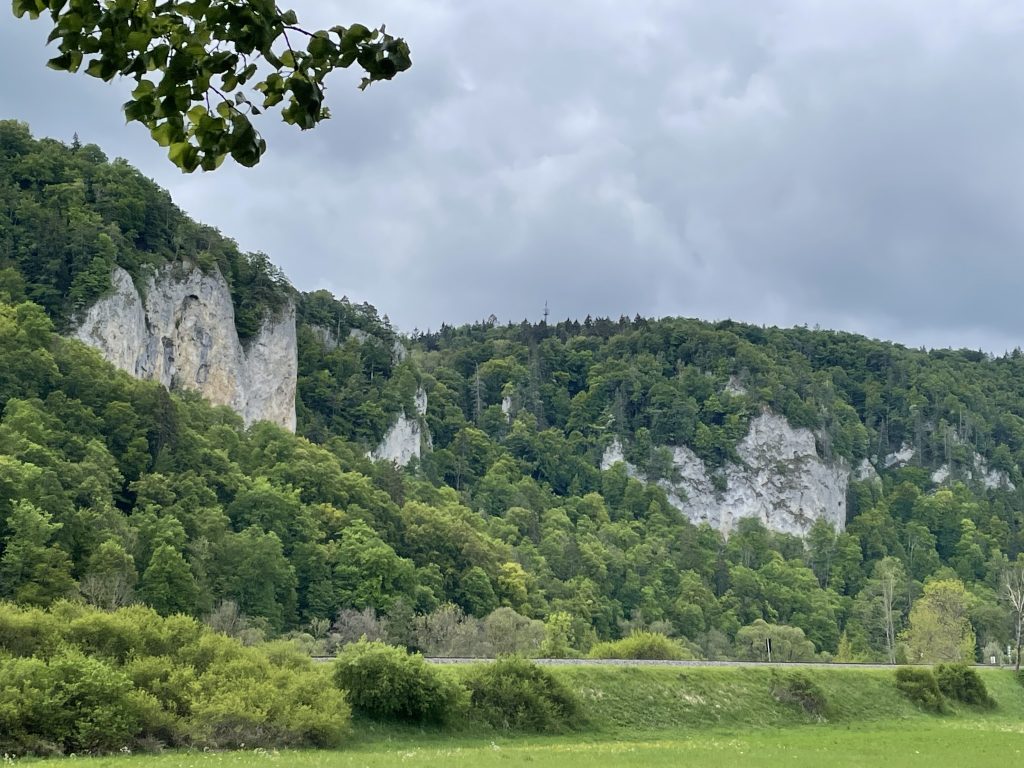
Our second ride – we again chose the short route – took us first to Donaueschingen, to the source of the Danube, where two watercourses (the Brigach and the Breg) meet and the Danube starts.

We stopped at the long, carved ‘totem’ that sits near the confluence of the two rivers that form the Danube.
We continued into the town of Donaueschingen to an ornate spring

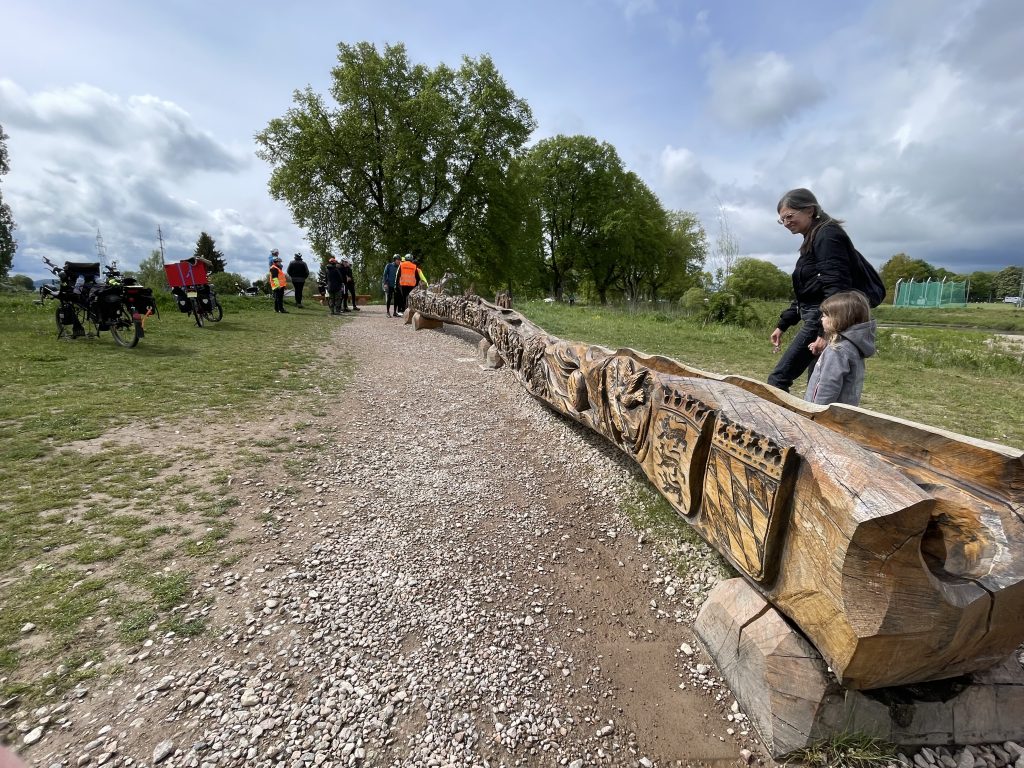
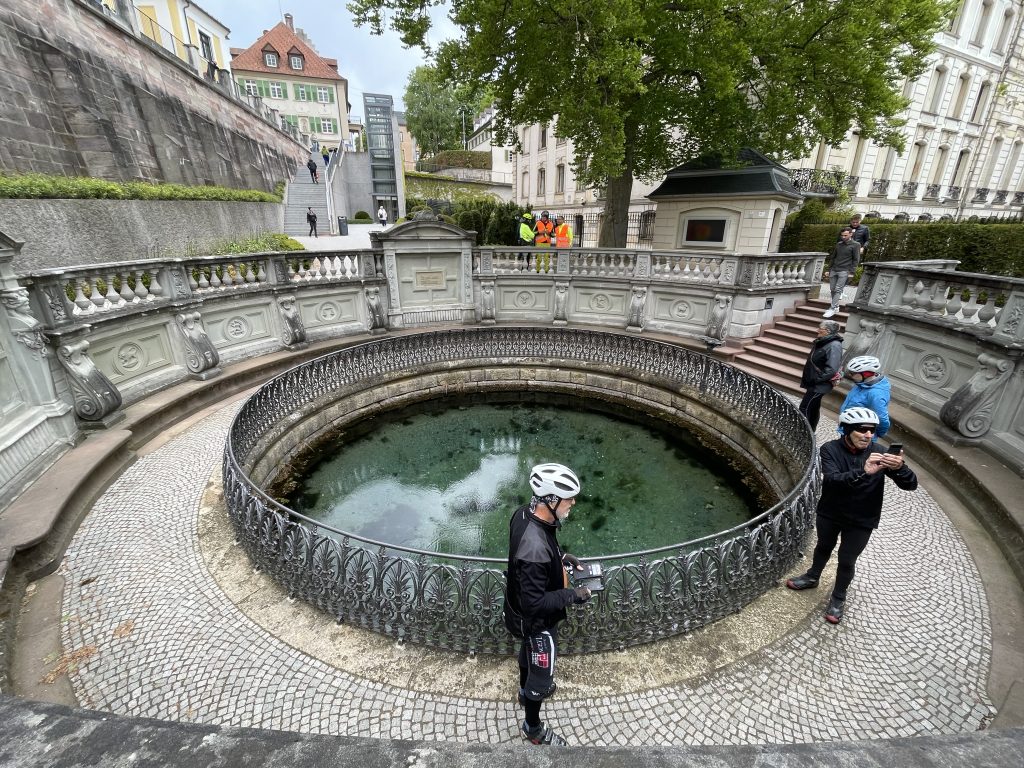
The local Fürstenberg family, had this basin built in the 19th century, where the first drops of water are said to spring forth in the park of Donaueschingen Castle. This spot is often symbolically called the “source of the Danube” (Donauquelle in German).

After coffee and cake (apple strudel for me), we were back into the countryside. Reiner and Marion were our ride leaders for the day.
Next stop, the spring of the Neckar which flows north and flows into the Rhine at Mannheim.

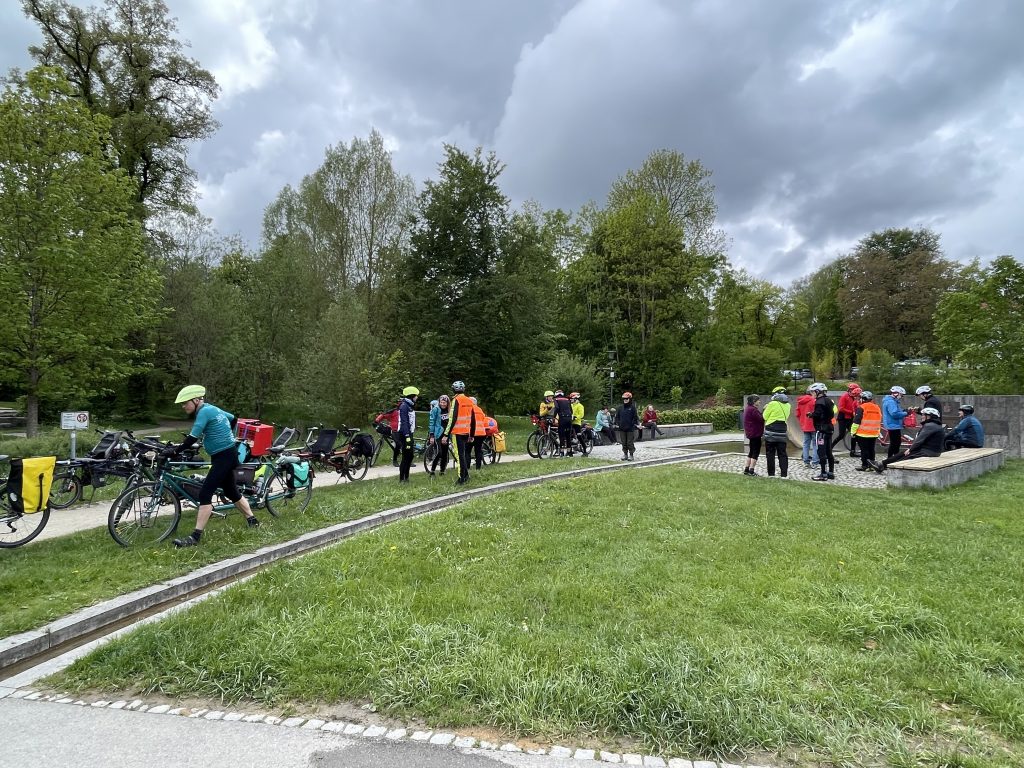
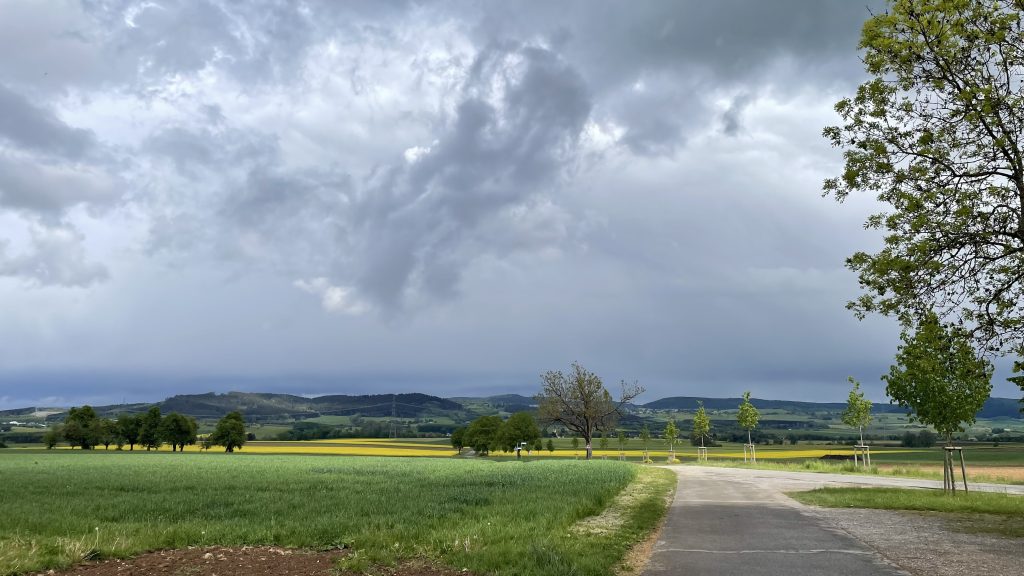
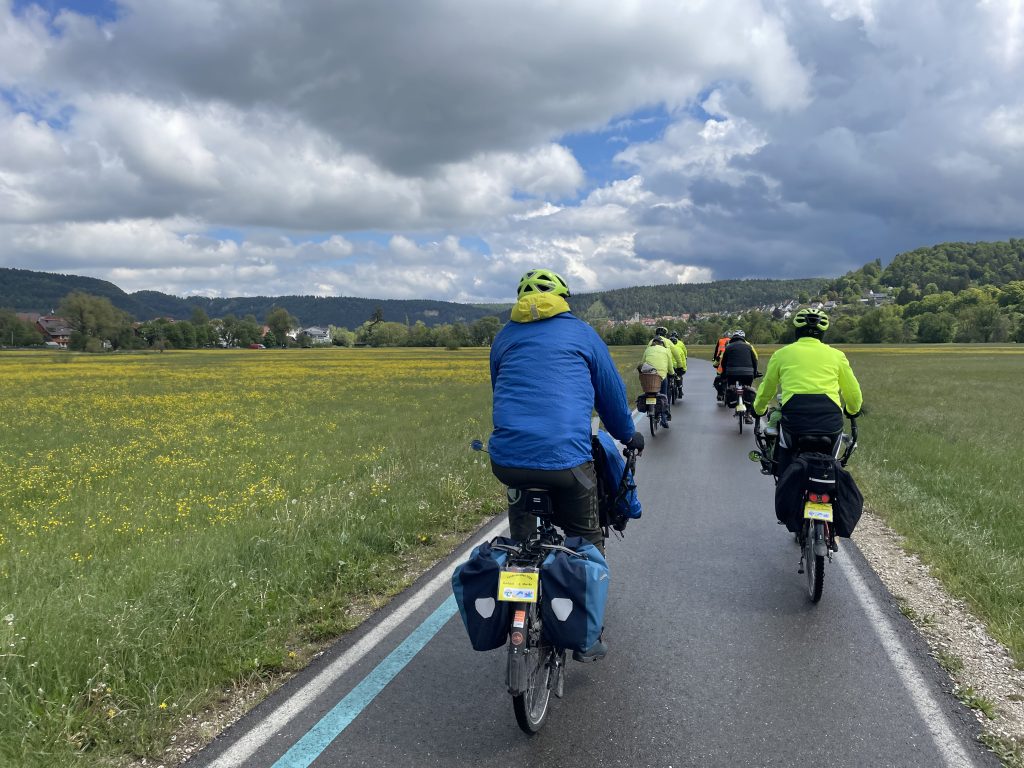
Riding back the skies threatened a soaking but Reiner chose a strategic stop for coffee to allow the storm to pass through. It was a good move, as later we passed lots of hail at the track side. Without our stop, we probably would have been under it.

Our third and final ride of the weekend. We headed north east, following the course of the Danube.
Here the Danube flows freely, but a little further on, it disappears into a sinkhole and is mostly a dry bed for several kilometres.
In wet months, the river flows, but even with the rain we had, it was almost bone dry. The stepping stones were novel, but not needed.

About the Danube sinking

Our ride continued along the Danube Valley towards Tuttlingen.

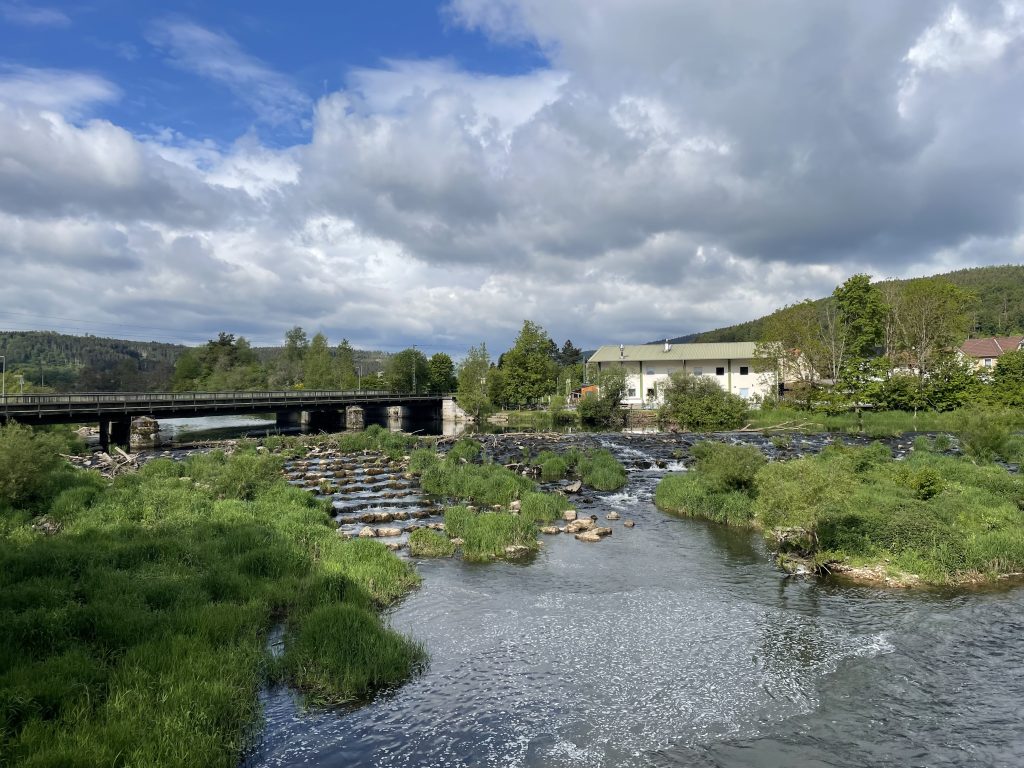
Shortly before the town of Tuttlingen the rain eventually found us with a brief but fairly heavy downpour mixed with hail. Fortunately we had sensed the imminence of it and stopped to done a second layer of waterproofs – there’s a first time for everything. I usually carry two sets, so it one gets soaked, which they eventually do, I can swap to a dry one, but it was so cold that I already had one on and doubled up ahead of the rain.

On reaching the town it had almost stopped, so we descended on an open cafe to drink coffee, eat cake and drip all over the floor.

At the furthest point of the ride, there were these high cliffs forming a wide gorge. I imagine, in wetter times, the valley becomes a flood plain, which is why the railway is elevated.

Our return route followed the outward one. Back at the hotel I put the bike into the back of the car and then we enjoyed more social interaction in the bar and over dinner. Later, Reiner covered who was going to organise TT27. And just like that, it was all over for another year. At breakfast there were goodbyes and lots of hugs.

We were in no rush, but eventually we headed away for our first stopover at Saarbrücken. It being Sunday, the roads were relatively quiet with very few HGVs, as they are discouraged from driving on Sundays in Germany.

The hotel was a Holiday Inn Express, and had no restaurant but there were a few eateries nearby, including an Asian buffet and as Karon’s blood sugar was low, we decided to eat there, choosing from the menu rather than the buffet. It was good and after, just a short walk back to the hotel to while away the rest of the evening with a drink in the bar.

Namur was our next stopover, between three and four hours away – it’s what I aim for as longer in the car is no fun. As we headed out of Saarbrücken, I stopped off at a hypermarket so we could buy some wine and spirits.

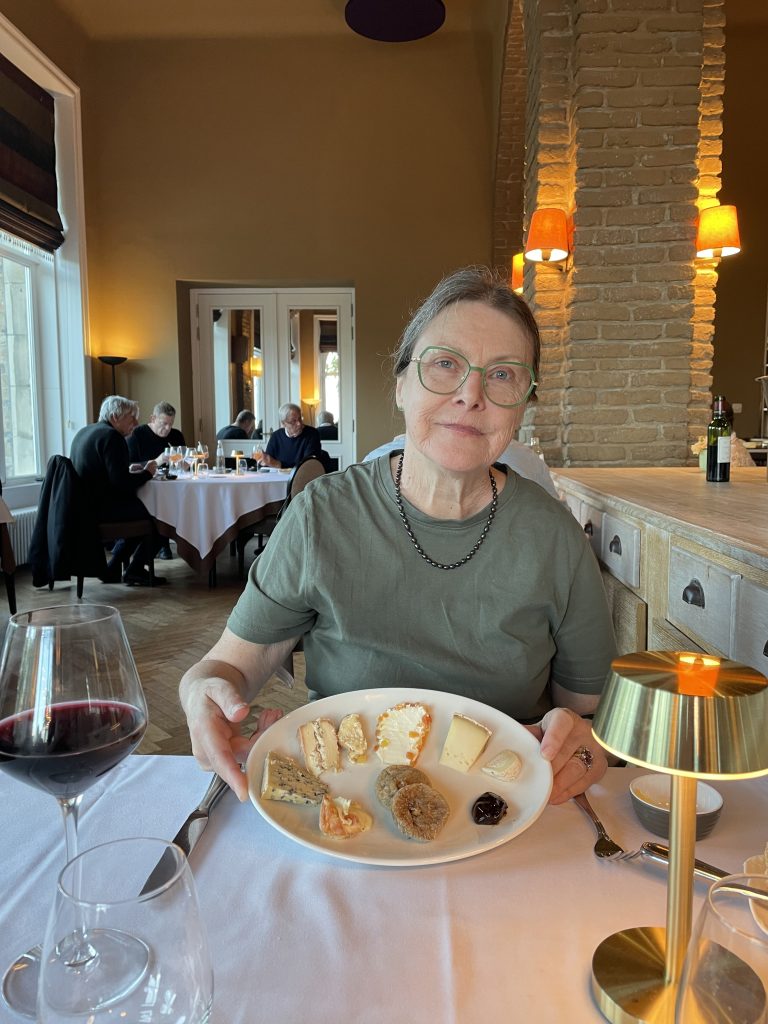
The Chateau de Namur sits above the city and despite some ongoing works in the grounds, still looks impressive. I had pre-booked a table in the restaurant for 7.00pm so we chilled in the room (too wet and windy for a walk) then went to the bar at about 6.30pm. The meal was excellent and we had a very enjoyable, if expensive evening.

Not great weather for a walk, so we chilled in the room before dinner.
Karon was impressed with the huge selection of cheeses on the trolly. These were just a small sample!

Next day we headed for the Dunkirk ferry and caught the 14.00 and were home by about 17.00.

Spinner Grind 20″ fork service

The original forks on our 2011 Pino are Spinner Grind forks. After a decade of riding, the fork was showing signs of a desperate need for replacement or at least a service.

After some searching on Youtube, I couldn’t find a strip down of the same fork, but there were videos of similar coil-sprung forks. I decided to buy a new set. It seemed the Grind was no longer made, but through JD Tandems I purchased the Spinner 300 20″ fork as a replacement. Note, the fork has a steerer clamp at the crown, specific to the Pino, so ‘any’ 20″ fork is not suitable.

Top of the fork showing the steerer clamp and the headset cap on top of the frame.

Removal of the fork is very straightforward. Remove front wheel, then the mudguard, brake calliper and any other attachment like wiring for a trip meter or dynamo. Once the fork is free of all attachments, undo the allen bolt in the centre of the headset cap on the top of the frame in front of the stoker’s seat.

The fork should then drop out. Depending on the year of manufacture, the Pino fork may vary but the servicing should be similar. Youtube videos help, but I couldn’t find one for the specific Spinner Grind we have.

Start by loosening the Allen bolts in the foot of each leg.

Before removing the bolts entirely, while they still have a little thread, tap them to loosen the inners, then remove the bolts. The fork lowers can then be pulled off. The photo above shows the fork lowers partly pulled off.

The fork lowers, fully removed.

Next step is to remove the caps at the top of each leg on the uppers.

The steerer clamp restricts access to the left cap and I used an adjustable grip to unscrew it. The right leg cap can be unscrewed with a socket.

With the caps removed, you can push the rods at the end of the lowers up to push out the preload and spring/elastomers in the upper legs.

The completely disassembled forks. The right fork contains the pre-load and the left a simple coil and elastomer arrangement.

Once the forks are stripped down, everything can be cleaned and regreased. The tubes, especially the outers, can collect moisture which in turn can rust the inner surfaces and those of the uppers. The same can happen to the springs. It may be necessary to use a spirit based cleaning liquid to break down the old grease and oil before applying new.

Assembly is the reverse, with everything covered in fresh grease, but before reinstalling the two allen bolts into the inverted fork, I drop some oil into the holes then fit the bolts. You may need to tweak the position of the lower rods so the bolts align with them to successfully tighten them into place.

As I have two sets of forks, the rejuvenated set can be kept in the bike shed, ready for the next change-over in a couple of years.

The Spinner 300 and the Spinner Grind next to each other.

The 300 is marginally longer than the Grind and has a different disc brake mount. On the left, the 300 Post Mount with adapter and on the right, the Grind IS mount and adapter.

Because the 300 is about 2cm longer than the Grind, if your Pino has the Hase stand fitted, it may not have enough length to support the bike properly when up on the stand, so the legs need to be lengthened. I did this by using a couple of M12 bolts inserted into the tube of the leg and held in place with some ‘No nails’ glue. A nut placed on the bolt prevents the bolt from overpowering the glue and sliding into the leg tube.

Initially I used taped to find the right length for the bolt to extend. Once adjusted I used some glue to hold the bolt into the tube. I must have a snug fit. I am pretty sure it’s M12.

British Cycle Quest (BCQ)

When Karon and I took retirement together, on my 65th birthday, we decided to start collecting BCQ answers. For an explanation, see the page on the Cycling UK website. Logically, we started with the BCQs nearest our home, cycling from home to a few that were within range. We collect all the BCQs as a team, riding to them together, usually on our Hase Pino tandem, but have also ridden solos, though Karon is limited to much shorter distances and easy terrain when not on a tandem.

One of our early rides, in Windsor, near a BCQ

For the rest of Hampshire we went on a mini-tour with camping gear, cycling down the county on the west – Winchester side, collecting BCQs as we went. We took the ferry to the Isle of Wight and spent four days camped there and collected all the BCQs then made our way back home up the eastern side of the county to complete Hampshire and the Isle of Wight.

Base camp on the Isle of Wight at Nineham Country Holidays campsite

Over the next few years or so, we collected virtually all the answers in the south of England, making car-assisted day trips or stopping overnight in an area. For some of the inner London ones, we took our Brompton’s on the train and used them around the City.

February 2018 – the tricky ride to get the BCQ near Combe Gibbet

If we are on the Pino, we can ride further and sometimes collect more than one BCQ in a single ride with some careful route planning. Distances primarily depend on time, terrain, and the weather.

When a family get-together was planned to meet in Edinburgh, we went up early and spent some time collecting some of the BCQs around the west coast of Scotland before making our way to Edinburgh.

Another cold one – on Arran in April. A week or so later we were due to attend a family get-together
March 2019, by the BCQ at Greenwich
4th April 2026 – our most recent BCQ, collected on a ride at the Tandem Club Easter Rally. We have more ‘BCQ trips’ planned for 2026 to tie up Devon (5 remaining) and Somerset (3 remaining). And in June we will be tacking the BCQs in the Orkneys and the Shetlands.

Planning and admin

Whenever we take the bike(s) to a new area, I check in advance to see if there’s a BCQ we can collect, even if that’s not the main purpose of the trip. A couple of Army reunions in Hull have resulted in extra days in the area to collect a few. Whenever we attend a Tandem Club Rally in the UK, we’ll modify the routes to take in any nearby BCQs if we can.

When we’ve cycled from home to Harwich, for the ferry to the Netherlands and a cycle tour on the continent, I’ve varied the outward and return routes to take in some BCQs.

For planning and navigation I use ‘Memory Map’ (OS 1:50k) and RideWithGPS (RWGPS). In Memory Map I can plot individual BCQs and make a note of the question. I could plan a route too but prefer the features of RWGPS. This allows me to receive turn-by-turn route instructions straight from my phone into my hearing aids via Bluetooth.

The same route on my desktop screen, with a marker showing the question at the BCQ.

The Tandem Club also has a BCQ table and map on their website, which members can see once they are signed in. This has the advantage, like the Cycling UK map, of being online, so if you can get a reasonable signal, wherever you are, to can see any nearby BCQs. As you check off BCQs in the matrix (not shown), the map updates automatically.

The personalised map on the Tandem Club website (members only), that shows remaining BCQs – in green, and collected BCQs – in yellow. The map is also showing some cycle routes

I keep a copy of the Question Book PDF on my mobile and on my Mac at home. The PDF displays almost the same on big screen or little.

The PDF of the BCQ Question Book. I highlight the questions as we collect the answers so I can immediately see which BCQs remain
The matrix on the spreadsheet issued by Cycling UK. Participants can fill in their answers on the other part of the spreadsheet (not shown) and this matrix updates automatically. Once several BCQs have been added, you can email the file to Cycling UK for validation
A while back I designed a graphic to display our BCQ status. This is as at 28th April 2026. As you can see, there’s a way to go yet!

Home to Malente

Our ride from home to Harwich for an overnight ferry to the Hook of Holland, then across the Netherlands and through Germany to Malente in Schleswig-Holstein, not that far from the Danish border.

Words and pictures here

Recent watercolours

Some of my most recent watercolours. I belong to a facebook group that posts challenges which result in some efforts from me. With others, it could be just an image I like and want to have a go at.

An old Ford I first had a go at 40 years ago.
Flatford Mill, or rather Willy Lott’s Cottage next to the Mill pond.
Boats. A challenge from the ‘Purely Watercolour’ group on facebook. Some pen & ink in this, which is allowed despite the group title.
The harbour at Tenby, from one of my own photos.
Street scene in narbonne, France, from one of my own photos.
Old houses. Evidently, Bristol in the late 1800s.
Shed. Another challenge from Purely Watercolour.

Tweaking the Bafang

In February I decided to try and legalise the Pino as best I could while retaining the throttle to get the bike moving at junctions etc.

See my previous post about reprogramming the Bafang motor

Having seen several posts on Facebook where the police had seized e-bikes for having throttles that power the bike without pedaling, even if only up to 15.5mph, I thought I should try to get the Pino as close to being legal by curtailing the throttle top speed even more. Legally the throttle can only power the bike up to 6kph (3.7mph).

Now I’m in a bit of a pickle… With a throttle, I can apply power, get the bike moving and then we can start pedalling. This is possible even on a good gradient. It’s so handy that I consider the ability to accelerate the bike fairly briskly at busy junctions a safety feature. But with the throttle powering the bike up to 15.5mph we could fall victim to a zealous member of our police force.

Without any electric assist, getting the Pino moving, even on the flat, is not easy. It takes a couple of ‘scoots’ from me to get the bike moving enough for me to get my feet up onto the pedals, then we can both start pedalling and once moving, we’re ok. On any rise it becomes extremely difficult.

Whatever arrangement we have is going to be a compromise but I thought we could experiment a little so I disconnected the throttle completely but reduced the number of pedal revolutions it takes before pedal assist kicks in and increased the amount of power initially applied. We went for a 25-mile test ride to see if we could do without the throttle but a more aggressive uptake from the motor. At a junction on a slight incline, getting going proved tricky and at another junction on a blind bend we didn’t accelerate fast enough to get across the road comfortably.

So, I want to retain the throttle, limiting it’s speed to something which will still be useful when we need to pull away uphill or at a busy junction. I connected up the programming cable again, but found there’s no straightforward way to set the throttle maximum speed to 6kph – the system won’t accept it. After some searching and reading blogs and discussion groups I found a reasonable work around.

This is now the set-up for the Pedal Assist. I reduced the Slow-Start Mode to 4 (for a faster application of assist power) and the Start Degree (Signal No.) to 2 (for less of a pedal revolution before the assist kicks in).
On the PAS settings I changed ‘0’ to 100% current and a speed of 40% (of25kph). The throttle setting below will refer to Assist Level ‘0’….
The Designated Assist was set to 0 (from ‘Display’)

The result is that in power level ‘0’ the throttle will still have no effect, but in all other levels it will achieve 40% of that power level’s maximum speed. As the Bafang provides assistance at the chainwheel, not the hub, any assistance is amplified by higher gears on the Rohloff. In level ‘1’ the throttle will move the bike without any pedaling to only a couple of mph and in level ‘9’ it will power the bike up to about 8-9mph.

We normally pull away in gear 8 on the Rohloff and in power level ‘9’ that will power the bike up to about 6mph which should be fast enough even on a hill start.

Another test ride will see how we get on.

Cannondale E-assist retro-fit

Back in 2024, Karon had commented that we rarely rode the Cannondale anymore and I had to agree. While it was fine on the flat, we struggled on the hills and it was putting us off taking it out. I had a ‘spare’ Bafang BBS01 250W motor in the shed and an old 36V battery that still had reasonable capacity, so I decided to see if I could fit it on to the ‘Dale.

Useful videos

Bottom Bracket (BB) types

Park Tools videos on BBs

Some good points on this one and it talks about alternative chainrings.

Points to note fitting a BBS01/2 – Note that the supplied brake levers with sensors are only suitable for hybrids and MTBs with cable brakes, not road bikes with drop bars. Sensors to fit non-standard or hydraulic levers can be bought separately. Personally, I am ok with not using brake sensors and fitting them neatly to road levers would be a challenge. The motor will still operate without brake sensors/levers fitted. It’s quite easy to ride without the sensors… if you want to stop the motor, just stop pedalling.

Third party brake sensors for hydraulic brakes and if you don’t want to use the Bafang cable brake levers. They are glued to the brake lever housing and a magnet is glued to the lever. When the brake is activated, the sensor cuts power to the motor. They work, but it adds clutter and they look ungainly. I run the Cannondale without any brake sensors.

Fitting the Bafang was pretty straightforward on our Cannondale but this is the fourth fitting of a BBS01 I have done. I first needed to remove the original stoker’s chainset and front derailleur – as shown in the videos. Once this was done the Bafang motor and integrated bottom bracket slides in from the drive-side. The cable guide under the BB made it tight but I used a rubber mallet to drift the motor into place and the rear gear cable was still free to move.

The original Cannondale BB was an ISIS drive and the Bafang is a square taper (diamond) as can be seen above and in the picture of the cranks below. The drive side uses the right hand crank that comes with the motor. On a solo the left hand crank would also be used, but on a tandem with left side timing chain, the stoker’s left crank may need replacing with a square taper crank and spider for the timing chain unless the original BB is also a square taper. I ordered a left hand tandem crank from Spa Cycles, square taper, black, 5 arm, similar to the unchanged pilot’s timing chain crank/spider, but the replacement spider was 110 bcd and the old spider was 104 bcd, so I also had to buy a 42T 5 hole 110 bcd chainring to fit the new crank/spider.

While I had the motor and a spare throttle, I didn’t have the wiring harness or display so those were ordered from Amazon. I like the DPC18 display – I have one on my MTB – as it carries more information and has a USB outlet. The Bafang BBS01 and 02 motors are very common, so there are lots of spares available on Amazon and eBay.

The Bafang DPC18 display with control buttons. This is designed to straddle the stem. It has a USB outlet to the rear which is handy if you use a navigation device or phone on long rides.
I originally utilised the bottle cage mounts and a heavy duty zip tie to mount the battery on the downtube under Karon, but she lost her bottle cage. After putting the timing chain on, I realised there was enough space on the lower spar, so moved the battery and reinstated Karon’s bottle cages. I used rivnuts to attach the battery mounting bracket to the lower spar on the frame – see later in this article.
The stock 44T Bafang chainring. I have not fitted the chainring cover. Fitting the motor meant losing the triple chainset. I replaced the 11-32 cassette with an 11-36. That enables us to keep the top end the same while extending the bottom end of the gear range. Having the motor means there’s less need for very low gearing.

Chain alignment isn’t really an issue when swapping out a triple chain-ring for a single Bafang one.

The replacement left hand crank for the stoker with 5 arm 110 bcd spider. 42T chainring fitted.
Typical rear part of the battery mounting bracket with cable arrangement. The pin type will vary depending on battery housing. It may come with a fuse as shown here, or the fuse may be housed within the battery. I use a connector outside of the mounting bracket, so I don’t have to disassemble the bracket if I want to remove the motor for servicing/replacement.
I already had a spoke magnet for the trip computer for Karon (she likes to see speed and mileage), so I aligned the Bafang speed sensor to that. The single magnet will activate both. The speed sensor is an essential part of the system and if it does not align with the magnet and ceases to function, the motor will cut out after a couple of minutes.

As mentioned already, I decided not to try adding brake sensors. I had them on an MTB but removed them after a while and found I hadn’t needed them.

The cheap plastic accessory clamp I used to hold the control buttons and throttle, bought from Amazon. The ‘T’ section pulls out, leaving the clamp and tube, which I cut down to the length needed for the controls.


I appreciate the throttle is technically illegal in the UK, but I find it essential on hill starts and it helps when trying to pull away briskly at road junctions. Having the controls next to the hoods allows me to use my thumbs to move up and down power levels and use the throttle to help on hill starts and at junctions. It will not power the bike above 15.5mph. With the controls on the left, I have sometimes inadvertently increased the power level when resting on the hoods… my thumb tends to rest against the up switch and if we hit a bump it’s enough to activate the up switch.

The added power from e-assist means that a front double or triple chainring is largely redundant, but with the stock 44T chainring I decided to increase the gear range by swapping the rear cassette for one with a wider range.

I swapped out the 10 speed 11-32 cassette for an 11-36. 36 is as big as you can go with the standard 105 rear mech without a hanger extension.

I also had a spare inset chainring – a narrow-wide 38T – which I think is the smallest that can fit the Bafang because of clearances. I fitted this inside the Bafang chaining. If we ever take the Cannondale to a more hilly area, or we ride it with loaded panniers, I can manually drop the chain onto the smaller ring and lower the whole gear range.


The chain on the Bafang chainring and on the inner offset, narrow-wide 38T ring. It’s pretty easy to swap the chain from one to the other manually.

Here’s a video showing how to fit the rivnuts into place. The guy’s voice is a little annoying but the method is good.

While the zip-ties to hold the battery mount in place worked ok, I didn’t like the look of the ties wrapped around the frame, so I removed the mount and put three rivnuts into the frame.

The rivets make for a much tidier and stable finish.
No zip-ties! I also got rid of the others on the down tube which heldthe cable that runs from the motor to the bar-mounted display and controls, replacing the zip-ties with guides made from black ‘Sugru’ mouldable glue. I also used Sugru to form a seal on the battery mounting bracket where the power cables pass through the end of the bracket. It will help keep water out of the internals of the bracket in heavy rain.

I used Sugru to make some cable clips stuck directly to the frame. This allowed me to dispense with zip ties for cable management.

The finished set-up without zip ties.

The Cannondale is a light tandem at only 17.5kg in its raw form. The Bafang BS01 can have 5 or 9 power levels to spread across the range, up to the legal 15.5mph (25kmh). I run 9 and usually select power level 6 or 7 to cruise at. This provides assist up to about 12-13mph and on the flat and without a headwind, we usually run faster than that, which means the motor has cut out for much of the time. If we hit a slight gradient, or there’s a headwind which drops our speed, the motor will ‘take up the slack’, but under normal circumstances there’s enough battery capacity to cover us for more mileage than we would usually cover in a ride.

Pino Update

Below are the current (March 2024) rules for UK EAPCs (electrically assisted pedal cycles).

What counts as an EAPC (Government site)

  • An EAPC must have pedals that can be used to propel it.
  • It must show either:
    The power output – Bafang motors come with visible labels stating the output.
    The manufacturer of the motor – ‘Bafang’ is embossed into the motor casing.
  • It must also show either:
    The battery’s maximum voltage – both batteries are labelled by the manufacturer.
    The maximum speed of the bike – not marked anywhere.
  • Its electric motor:
    Must have a maximum power output of 250 watts.
    Should not be able to propel the bike when it’s travelling at more than 15.5mph.
  • EAPCs may have more than two wheels (eg. a tricycle).

This penultimate point troubled me a little. More recently, on social media, I have seen that the Police have targeted e-bikes to check the maximum speed. OK, their focus may have been on Deliveroo and Uber Eats riders but there’s still a slim chance of the bike being checked, especially if we were involved in an incident/accident. The last thing I want is to have the bike confiscated due to a (in my opinion) minor but illegal feature.

While it’s handy being able to apply the throttle and boost the speed a little (up to about 20mph in favourable conditions), it’s not essential, so I decided to see if I could reduce the top speed of the throttle to the legal 15.5mph limit.

A little searching on the web and I found a pretty good video showing all I needed to know…

There are several videos on the subject but this is one of the better ones.

I ordered the necessary cable from eBay.

The Communications Cable for altering some of the settings and parameters in the Bafang BBS01/2

Online version of programming software for Macs (use Google Chrome browser).

The first section deals with the amount of power delivered in each of the assist levels (in this case 9). Note readings will vary between each configuration.
The second section deals how quickly and powerfully the assist kicks in.
This is the bit I was interested in – the throttle parameters. I changed the ‘Speed Limit’ from 40kph to 25kph (15.5mph). Again, figures and settings in this image may be different from what is shown.

Download Windows version of programming software here.

Borrowing Karon’s MacBook Air, I loaded the URL for the software, put the battery into the bike and turned it on then connected the cable, as per the video. I ignored the upper sections of the settings as I was only interested in the throttle section and there I changed the maximum speed from 40kph to 25kph (15.5mph). The ‘write’ was instant. After disconnecting the programming cable then reconnecting the cables on the bike I lifted the back wheel, set the power level to 9 (maximum) and pressed the throttle. The rear wheel initially went above 15.5mph as it was rotating freely without any load, but crucially, the power cut once above that speed and then settled to around a constant 15mph. Job done 🙂

There’s Government talk of increasing the legal limit of power of motors and possibly the top speed, but now I have all the necessary bits and links, I can make changes should the rules be relaxed in any way.

Knee update

Following my escapade on the stairs and the resulting torn quadriceps tendon, I had the surgery to fix it on the 21st November. I was called in at around 11:00am and went down to the operating theatre at about 4:30pm. Following the op, they woke me in recovery at about 7:30pm and I was back up to the ward by around 8:30.

If you’re not squeamish, there’s a video of surgery for a quadriceps repair here. Be warned!

Back on the ward after surgery to repair my torn tendon.

Throughout the night they woke me every hour (not that I slept much) to check my vitals. The painkillers helped so I wasn’t too uncomfortable considering. The surgeon popped in early the next morning and said everything had gone well – he said my legs were in good condition because of all the cycling and that had made his job a lot easier. I now had a more solid leg brace and had to have the leg locked so stayed in bed for much of the day. The consultant, on his rounds said I could go home later that day. Before that I had to show I was mobile enough to go home, so went to the physio section on the ward to practice walking with crutches and getting up/down stairs. I coped ok, so they said there was no problem with me going home. I texted Karon and we decided that Cas’s car would be better suited so she picked up Karon first then headed for the hospital. In the meantime, once I had all the meds I needed, which took a while to get together, they wheeled me down to the main entrance and out to the car.

The journey home was a bit painful, especially getting in and out but it went without any problems. The leg brace has to stay on for 2 months. It has locks both sides that must be engaged – initially at all times, but after a few weeks I could unlock the leg when sitting, to allow me to bend the knee a little and start to work the rejoined tendon.

Locked and loaded!

A return visit to the fracture clinic followed a couple of weeks after the op and a nurse removed the bandages and cleaned up the wound before applying a new dressing. A week later I removed the dressing. Another week passed and I went for my first physio appointment. Christmas came and went and early in January I went back to physio.

Around Christmas time I stopped wearing the brace at night, which made sleeping so much better. I am pretty sure it helped too, as my leg had time to recover from the constant pressure of the brace bindings. I saw an improvement in discomfort and mobility as a result.

Progress was good, the wound was healing nicely and I had almost 90° movement in the knee, though it felt very tight. I went for a few walks, initially with the leg still locked, but then I released the lock to the 30° limit. It allowed me to walk almost normally (as much as one can with a leg brace), bending my knee a little and removing the need to rotate my hips. The 30° lock ensured my leg would not fold completely if my knee did give out.

As of Jan 5th 2024.

On 23rd of January, after 9 weeks of wearing the brace I was signed off by the surgeon and was told I could ditch the brace. The following day I had physio and tried a static bike – I could not quite get to the top of a pedal rotation, but I felt it wouldn’t be long before I could. Once home I set up my road bike on a supported roller and sat on. Top of the rotation was possible with the flat of my foot.

My road bike set up on the roller.

The next day it gave it a tentative first go…

Within a few days I was comfortably spending 15 minutes on the bike. Interestingly, my knee felt much better after a session on the bike – more supple and less uncomfortable.

Late in February Karon and I took the Pino out on a Tandem Club ride and lunch. I didn’t use the SPD clips, staying on the flat side of the double-sided flat/SPD pedals but had no issues. We had to work the motor a bit harder on the climbs to take pressure off my knee but by the end of the day we had cycled 30 miles with no ill effects.

A couple of days later, back in physio, my exercises were changed to help improve and strengthen the hamstring behind the knee. I have another physio late in March but think this may well be the last visit I need as the knee feels pretty much back to normal – apart from using the stairs where I still need a little support.

Won’t be riding for a while

Torn Quadriceps Tendon

Friday 10th September started like most days by taking Karon a cup of tea at 08:30. I put the tea on her bedside table without waking her, then went into the bathroom. The dog next-door barked… usually a sign the postman is outside. Looked out the window and sure enough, he was there walking away from the house. Assuming we had post, I ran downstairs. The stairwell was dark and I misjudged the last step onto the landing, thinking there was another step.

No. The result was I slammed my right foot onto the landing expecting it to travel another 6-8 inches. There was an audible (even without my hearing aids) ‘snap’ or crack and the pain just above my right knee hit. I have never experienced pain like it. I was shouting out and writhing around half-way down the stairs. It seemed to go on for minutes. The noise woke Karon. I must have passed out briefly as I was unaware of her passing me. After things settled a little, I dragged myself back upstairs and onto the bed. Passing the mirror I was as white as a sheet and dripping with sweat.

Spot the difference. My right knee is no longer symmetrical with the left.

Once prone the pain eased somewhat though it was still enough to make for the odd gasp and I was still shaking. I knew there was damage to the knee and I knew I wouldn’t get into a car, so I called an ambulance. Being non-life threatening, it took a while – about two and half hours – before a team from Reading turned up. Luckily the male member was a strapping lad who, after all the usual checks and some pain killers, propped me (virtually carried) down the stairs and then out into the ambulance.

In A&E Basingstoke I was handed over pretty quickly and about a half hour later passed into the ACU area. A couple of hours later the x-ray showed no broken bones but they couldn’t ascertain the damage to the knee tendons, partly because I couldn’t bend it enough for a thorough assessment. It being a Friday and now mid-afternoon, it was too late for a non-urgent trip to the fracture clinic, so the nurse said I could go home and the fracture clinic would get in touch early the following week.

In A&E the knee had swelled up a bit, but at least the pain wasn’t too bad now.

Eventually I was fitted with a leg brace then wheeled out to the main entrance for Karon and Cas to pick me up. Cas’s car is more accessible than Karon’s little MX-5!

At home with the leg brace. So glad we have a sofa with extendable leg props.

True to their word, I was contacted and told to turn up at the fracture clinic Thursday. This meant another long wait – about two and a half hours past my appointment time – but eventually I was seen and quickly assessed by one of the Registrars who confirmed what I had initially thought. A torn or partly torn quadricep tendon. Surgery is needed, so swabs for MRSA were handed over and the trauma team will be in touch for the knee to be repaired, hopefully sometime this coming week.

Then I can take my first trip along the long road to recovery.